


This article takes you through the creation of an NFT minting website similar to ExoBitsNFT.com. It is assumed that you have some knowledge of Non-Fungible Tokens, Crypto Currency, Smart Contracts and hot wallets like MetaMask. If you are not familiar with these technologies, this tutorial will give you everything you need to get going. However, it is strongly recommended that you obtain a good understanding of these concepts before proceeding with your own NFT project.
Why NFT?
When I explain the world of Non-Fungible Tokens to people, the reaction is invariably some kind of confused look followed by “I don’t get it. It’s just a jpeg.” I must admit that I have similar feelings toward the current culture of cigarette smoking avatars and abstract art. The value I see in NFT technology is its ability to create ownership of digital goods. Digital products that can both appreciate in value and are transferable in the same way as jewelry, or a collectible book. Right now an e-book has no intrinsic value. Your copy still belongs to the publisher, it can never be re-sold. Sure, it can be copied an infinite number of times, but those copies don’t belong to anyone, so they have no value. An NFT of that e-book is “your copy” and can be sold to someone to become “their copy”. That’s what gives it value.
My interest in NFTs isn’t about flipping the next Crypto Punk. It’s about exploring a technology that I believe is the future of all DRM. I’m a programmer by trade but I have always incorporated art and design (and aliens of course) into my work. Exploring NFT technology allows me to do both in a way that I find most compelling.
When I set out to create the website for my first NFT project, ExoBits, I had to collect information from disparate sources. This article serves to consolidate that knowledge by illustrating how to deploy a smart contract and write the JavaScript necessary to interact with it. If you like this article, head over to ExoBitsNFT.com and mint your own ExoBit NFT. The Ether made from ExoBits goes toward funding future NFT projects and tutorials like this one.
Demo Project
Throughout this tutorial, we will use an example project called ReExoBits. It’s a website that allows you to Mint static images of some of my interactive ExoBit NFTs. They’re “gently used” and may look a little yellowed, but they’re still as spry as the day they were minted.
Contract Deployment
This section will walk through the steps necessary to deploy the included smart contract “ReExoBits.sol” to the Rinkeby test network. If you’re already familiar with deploying an Ethereum contract, you’re welcome to use your preferred method and skip to the next section.

For this part of the tutorial we’re going to use Remix, a free, browser based, IDE that provides everything you need to develop, compile and deploy an Ethereum smart contract. To start using Remix, simply go to https://remix.ethereum.org/ and you’re up and running.
When you start, you’ll see a file browser in the left side panel. There will be a “contracts” folder with some sample contracts. If you’re learning about smart contracts and the Solidity language these are helpful examples. Ignore them for now because we’re going to use a prepared contract from the example project.
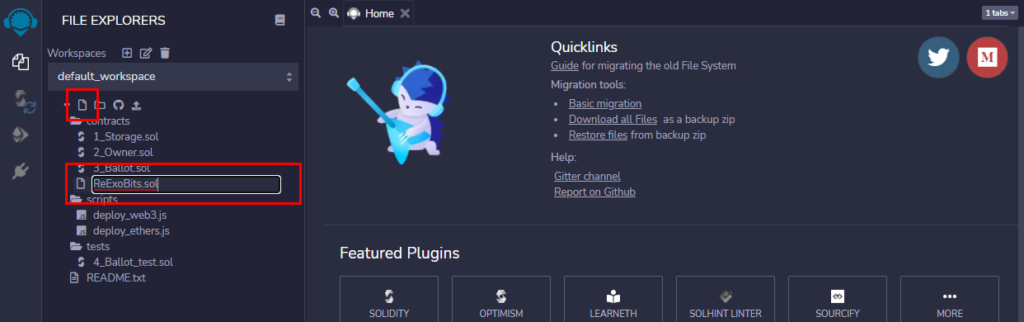
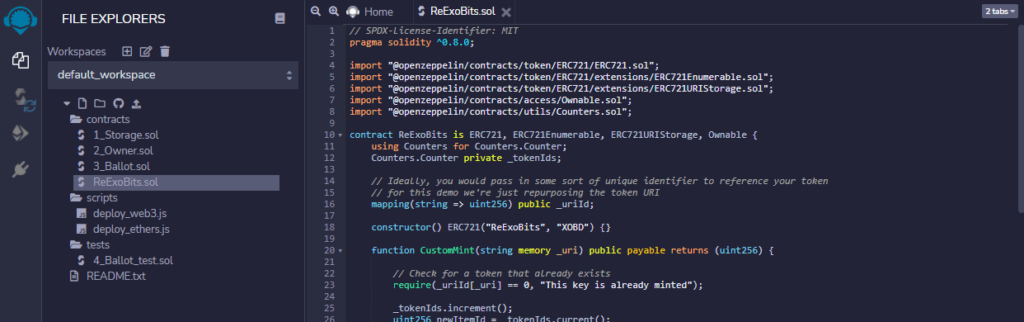
With the contracts folder highlighted, click the “Create a new file” button above. Name the new file “ReExoBits.sol”. If the file does not open automatically in the code editor, double click it to open. Returning to the example project, locate the file “Contract/ReExoBits.sol”. Open this file in your favorite text editor and copy its contents into the “ReExoBits.sol’’ file in Remix.
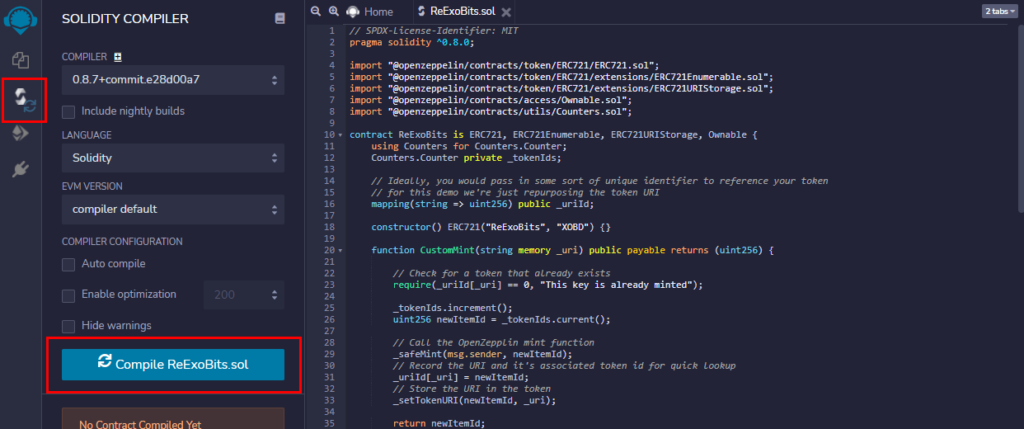
Now that you have the “ReExoBits.sol” source in Remix, it’s time to compile the contract. Click the “Compiler” button in the side navigation to bring up your compiler options. Click the large blue “Compile ReExoBits.sol” button. The “Compiler” button in the side navigation will have a green checkmark when your contract is compiled.
At this point, you will need the MetaMask wallet installed and set up in your browser. If you don’t have it installed already, head over to the MetaMask website to install and set up a new wallet address. Click on the “Metamask Fox” icon and wait a second or two for the wallet interface to appear. The selection menu at the top will likely say “Ethereum Mainnet”, click it and select “Rinkeby Test Network”.
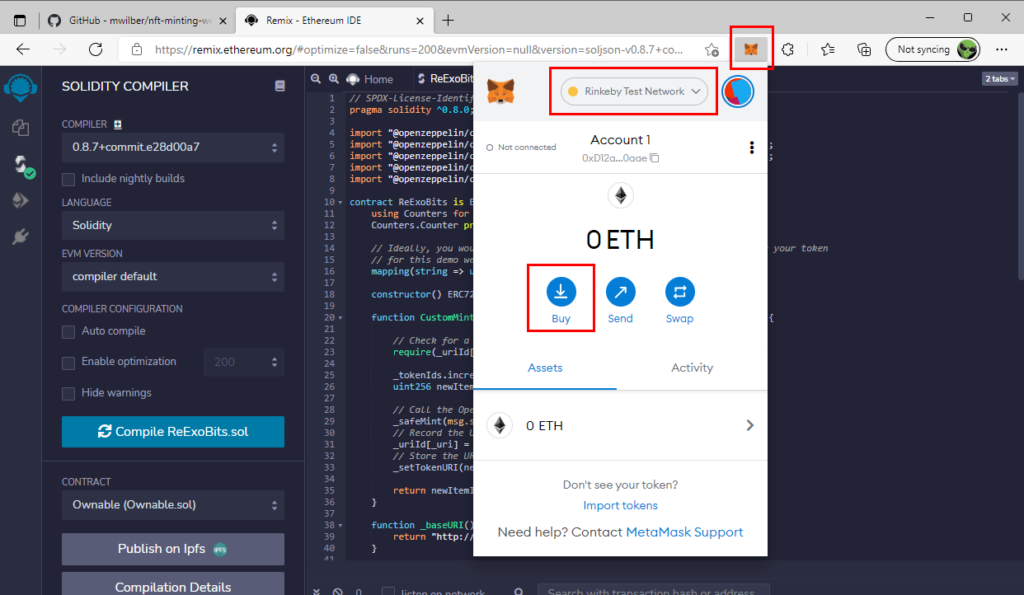
Now we need to get some free money to test with. Click the “Buy” button and a popup will open. Scroll to the bottom and click “Get Ether” from the “Test Faucet” section. The Rinkeby home page will open. Click the “Crypto Faucet” button and follow the instructions on the resulting page to get some Ether into your wallet. If you’ve never worked with a test net before it’s important to understand that this Ether works exactly the same way it does on the Main network, only exclusively on this Rinkeby test network. It cannot be exchanged for Ether on the main network or other currencies. NOTE: At the time of writing this article, the faucet linked in MetaMask is receiving an overwhelming amount of traffic. If your first attempt fails, try again later or seek out an alternative “Rinkeby Faucet”.
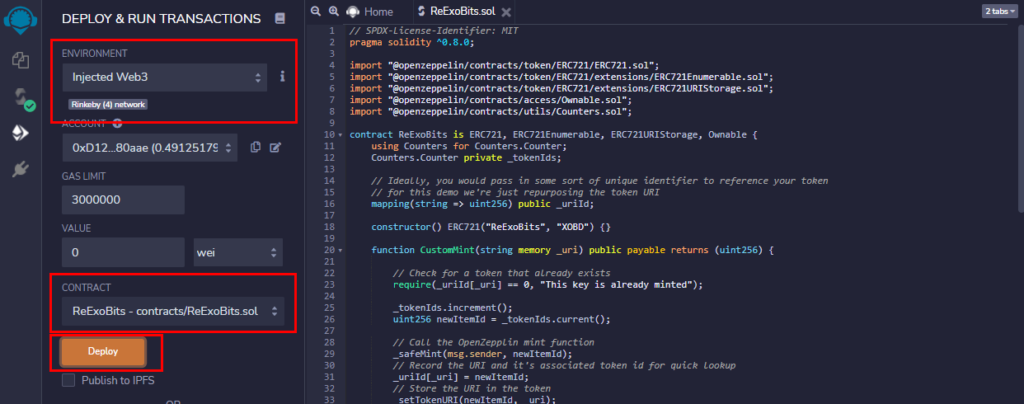
Returning to Remix, click the “Deploy” button in the side navigation to open the deployment panel on the left. This is where you publish your contract to the blockchain. The topmost select box, labeled “Environment”, allows you to direct where your contract is deployed. Select “Injected Web3”. This links Remix to your MetaMask wallet. Below the selection it should indicate the network your wallet is connected to, in this case “Rinkeby”. A bit further down you’ll see a select box labeled “Contract”. Make sure “ReExoBits.sol” is selected. Finally, click the “Deploy” button to deploy your contract to the Rinkeby Test Network. Shortly thereafter you should see it in the panel, below “Deployed contracts”.
Leave Remix open because we’re going to come back to it in a moment.
Contract Functions
The contract in this example is a basic ERC721 NFT contract. It is derived from the OpenZepplin library, an open source set of Ethereum contracts that are audited for security and accuracy. OpenZepplin gives us everything we need to start minting tokens right out of the box. There is quite a bit to the ERC721 standard but this tutorial will only focus on a few functions needed for the example website:
- tokenUri — An ERC721 standard function that returns the URI attached to a token. It accepts a single integer parameter for the token ID
- totalSupply — An ERC721 standard function that returns a positive integer representing the total count of tokens stored in the contract
- CustomMint — A custom function that will call the OpenZepplin “safemint” function to mint our NFT. It accepts a single string parameter that is a public URI to be attached to the token. Typically, this points to an ipfs server but for this example it will point to our development server.
- tokenByUri — A custom function that returns a token ID associated with the provided URI, or 0 if not found.
- tokensOfOwner — Returns an array of token IDs owned by the provided wallet address.
A note about this contract: For simplicity, this contract only attaches a URI to the token. While the ERC721 standard requires only that you attach a URI, typically you would store additional information, like a unique identifier related to the asset. It is strongly recommended that you seek out additional tutorials on contract writing to see the vast range of possibilities available in smart contracts.
Contract Address and ABI
There are two critical pieces of information needed to connect your JavaScript powered website to your contract on the Ethereum blockchain: The contract address, and the contract Application Binary Interface (ABI). If you’re not familiar with the ABI, think of it like a source map. It’s simply a JSON object with an array that defines all of your contract properties. It provides all of the information necessary for a JavaScript application to reference them. You can retrieve both the contract address and ABI from Remix.
First open the sample project in your favorite code editor. Open the file /src/components/Login.jsx. Locate the line where the variable contractAddress is defined. Delete the existing address in the quotes. The existing contract address points to the test contract used in writing this article and may no longer be available by the time you read this. Besides, you’ll want to use your new contract that starts fresh.
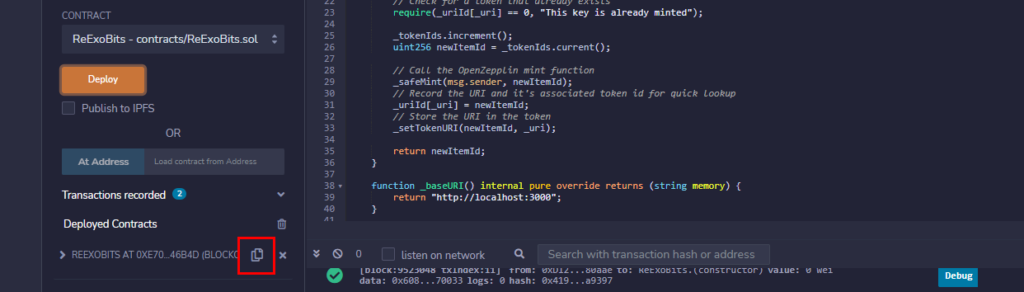
Return to Remix and locate your contract name at the bottom of the side panel, under “Deployed Contracts.” To the right of the name there is a “Copy to Clipboard” button. Click it, to copy your deployed contract address. Paste this address in the Login.jsx file to set the contractAddress variable to your contract address.
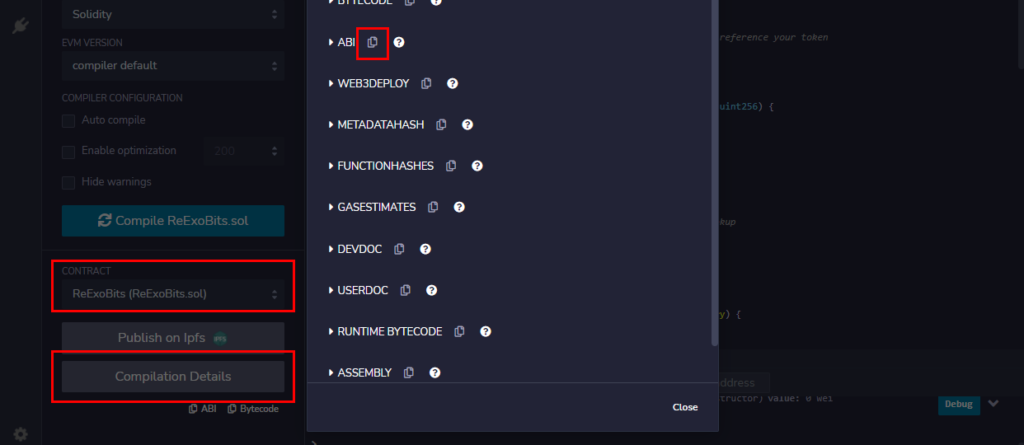
Return to Remix again and click the “Compiler” button in the side navigation to return to the Compiler tab. Near the bottom of the side panel there is a select box labeled “Contract”. Ensure “ReExoBits.sol” is selected. Click on the “Compilation Details” button. In the resulting popup you will see an item labeled “ABI”, click the “Copy” button next to it to copy the ABI array to the clipboard. Next, return to the project source and open the file /src/contract/ReExoBits.json. Completely erase the file contents and paste the ABI array you just copied. With the example contract, this ABI should be exactly the same as what you just deleted. However, if you ever make any changes to the contract you will need to update the project ABI array in this way.
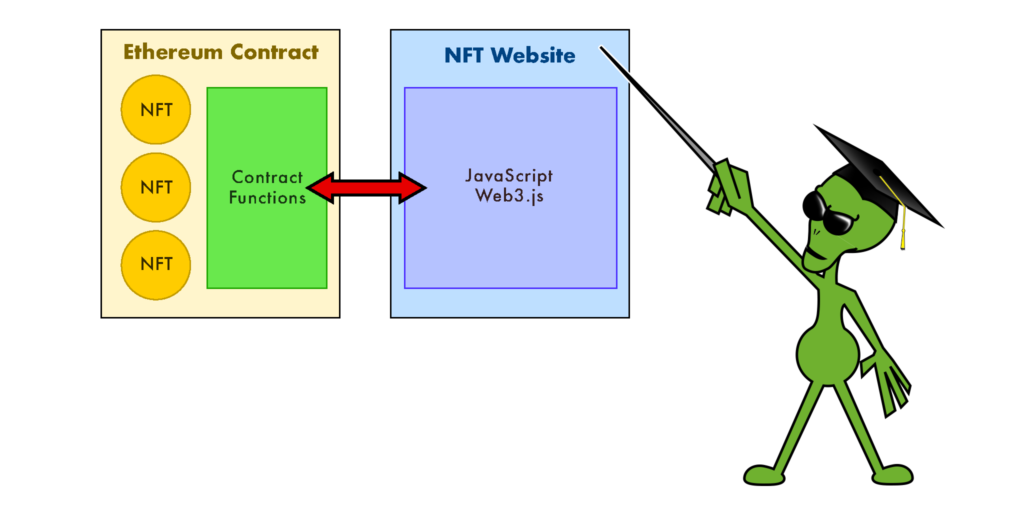
Web3
Web3.js is an open source library used to interact with the Ethereum blockchain from a JavaScript environment. It’s important to understand that Web3.js doesn’t access the blockchain directly. It must connect to a server that provides a JSON-RPC interface to a blockchain node. The server can come from a variety of sources. In the case of this example, your MetaMask wallet will provide that server.
Using Web3.js you will be able to do the following: Retrieve your public wallet address, connect to your Ethereum Smart Contract, read data from your contract (e.g. get a token URI), call functions in your contract (e.g. get a list of tokens owned by an address) and perform transactions in your contract (e.g. create tokens). That last item, performing transactions, in any contract is a bit of a special case. When reading data from the contract you are not changing its state. These kinds of operations are free because they do not need to update the blockchain. A transaction, on the other hand, mutates contract state and therefore must be “mined” to update the blockchain. For transactions a “gas fee” is required. In this example we will be using the free test Ether we got from the Rinkeby faucet. But on the main blockchain you must use real Ether, which is usually obtained with real money.
Test Run

At this point you can start up the project and view the website with the provided development server. First, we’ll install the npm modules necessary to build and host the development project. Most of the node modules we’re installing are for development but there are two used in the website itself: Web3.js and React. React is only used to simplify development of the website itself. If you’re not familiar with React, or prefer another solution, all of the project code that interfaces with the blockchain is vanilla JavaScript and easily adapted to other environments.
From the project folder in the command line, enter:
npm installWhen the install is complete, build the project and run the test server:
npm startOnce running, you can access the web server in your browser using the address:

Connecting the Wallet
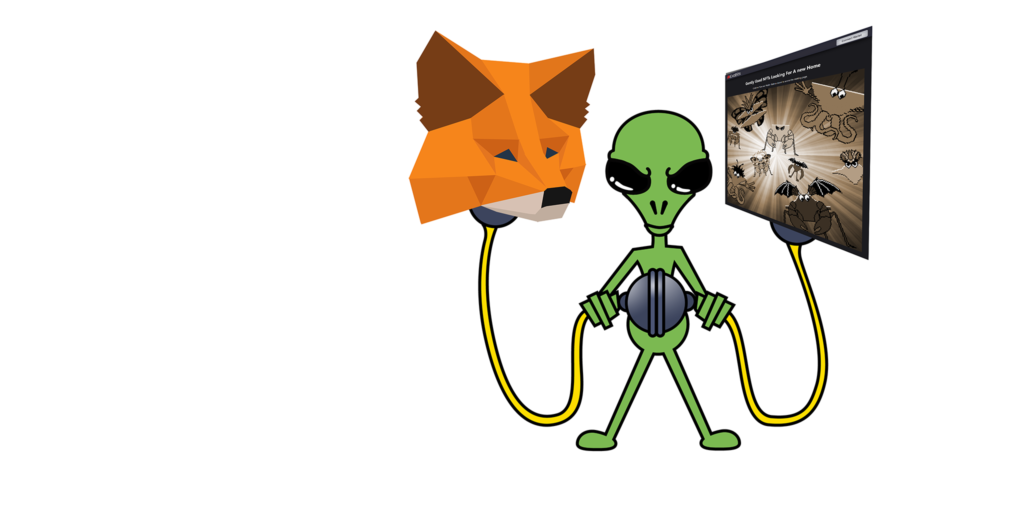
When loaded, the website will display a big “Connect Wallet” button. Click that button and you will receive a prompt from MetaMask to log in and authorize the website. After doing this, the connect button is replaced with a site navigation menu. Behind the scenes, both your wallet address and a reference to the contract was retrieved.
Let’s go through the code necessary to achieve this. Open the file /src/components/Login.jsx. When you click the “Connect Wallet” button, it calls the local DoConnect() function:
const DoConnect = async () => {
  console.log('Connecting….');
  try {
    const web3 = new Web3(Web3.givenProvider ||
                          "ws://localhost:8545");
    await window.ethereum.request({ method: 'eth_requestAccounts' })
    const accounts = await web3.eth.getAccounts();
    const instance = new web3.eth.Contract(
      ExobitsABI,
      contractAddress
    );
    props.callback({ web3, accounts, contract: instance });
  } catch (error) {
    console.error("Could not connect to wallet.", error);
  }
};
The first thing the function does is instantiate a new Web3 object. On the same line, Web3.givenProvider points to the JSON-RPC server provided in MetaMask. If you use another provider you would specify here. The localhost address is a generic fallback for local development and not used here.
The next line calls window.ethereum.request() requesting access to the provider and, in this case, prompts MetaMask to authorize the website. The Ethereum property is injected into the window object by MetaMask. Once authorized, we can access your contract on the blockchain via MetaMask and its JSON-RPC interface.
The next line retrieves the connected wallet’s address by calling the Web3.js getAccounts() function. The function returns an array of available addresses with the active one at position 0. The next line instantiates a Web3.js Contract object that is used to interact with the contract. The constructor accepts the contract ABI and address as parameters.
The wallet address and contract object are all you need to begin interacting with your live contract on the blockchain. In this example, those objects are passed into a callback function OnLogin(), in /src/App.js, to propagate them into the individual React components that make up the website. This final step will vary based on website implementation.
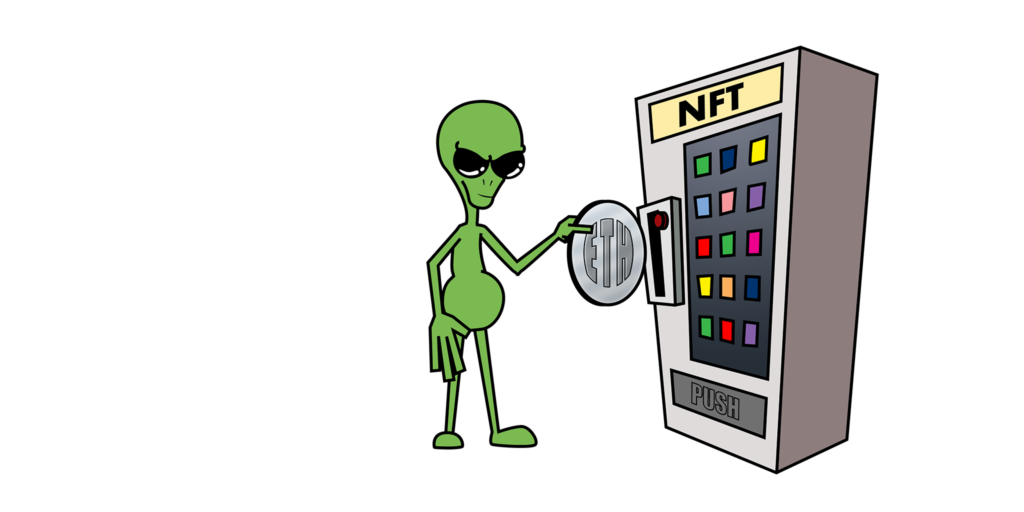
Minting Tokens
Now that you’re connected to the blockchain via the JSON-RPC service in MetaMask, you can begin interacting with your contract. One of the key features you’ll need in your NFT website is the ability to create, or “mint”, new tokens. The demo project comes with 4 predefined assets ready to go, you’ll find them in the /public/token_data/ directory. Each asset is a png file with an accompanying json metadata file. The URI for the json file is what you’ll pass to the mint function. It contains data in a standard format that third party galleries like OpenSea will understand. It’s through that json data file that your NFT ultimately points to the image resource.
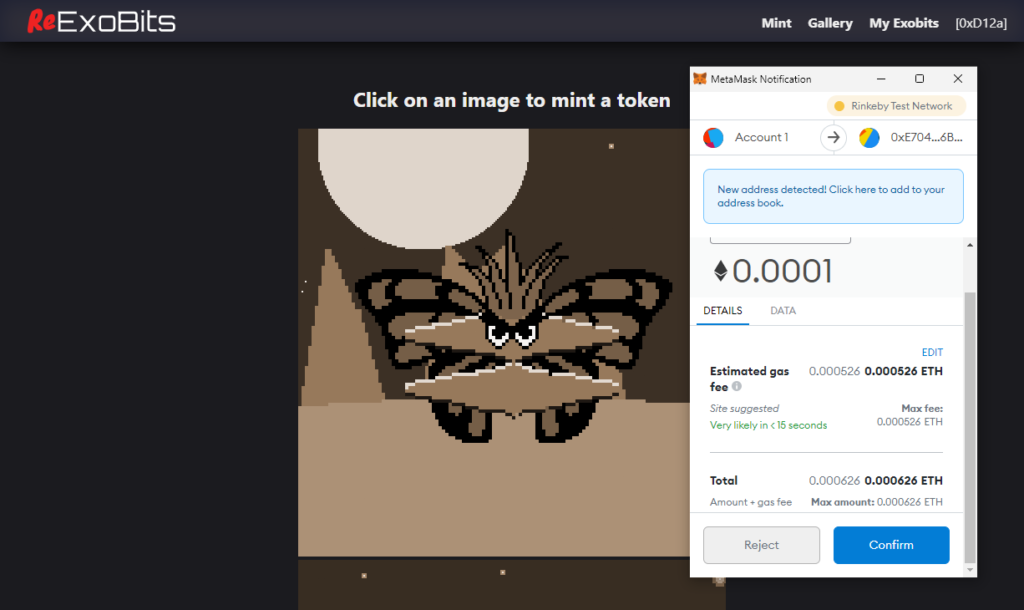
Let’s try minting a token. From the example website, click the “Mint” link in the top navigation. You are presented with four possible assets to mint. Minting is a transaction and therefore must be paid in “gas” to complete. On top of that our example contract also charges a minting fee of 0.001 Ether, paid to the contract owner. Choose your favorite image and click on it to mint the token. MetaMask will present a window to confirm the transaction. Once confirmed, you can follow the transaction status in MetaMask. Be patient, depending on blockchain activity minting can take minutes or even hours.
With your first token minted, let’s take a look at the underlying code. Open the project file: /src/pages/Mint.jsx The code in this file displays the 4 asset images. Each image has a click event handler that calls a local DoMint function which, in turn, calls the CustomMint function in your contract. Let’s take a closer look at the DoMint function:
const DoMint = async (tokenURI) => {
  try{
    let gasLimit = await props.contract.methods.
      CustomMint(tokenURI).estimateGas({
        from: props.address,
        value: 100000000000000
      });
    let result = await props.contract.methods.
      CustomMint(tokenURI).send({
        from: props.address,
        value: 100000000000000,
        gasLimit: gasLimit
      });
    CheckAssetURIs();
  }catch(e){
    console.error('There was a problem while minting', e);
  }
};
There are three main steps to this function. The first step retrieves an estimate of the gas payment necessary to complete the transaction. Because minting is a transactional process, i.e. it’s updating the state of your contract, a gas fee is necessary. The fee pays miners to update the blockchain which solidifies your transaction in a permanent public record. Gas prices fluctuate wildly. It’s important to know the amount expected so an accurate price can be presented to the user. Calling the estimateGas method, on a contract function, is like a dry run for the transaction. It will examine the contract CustomMint function and calculate the expected cost.
The estimateGas method accepts a parameter object matching the actual transaction. The object contains the requester address, as well as an optional “value” which is an amount of Ether transferred from the requester to the contract. The value is separate from the gas fee. It can be any amount, including 0, and in this example we have chosen to charge 0.001 Ether as a payment to the contract owner. The value is represented in “Wei”, which is the smallest unit of Ether. 0.001 Ether translates to 100000000000000 Wei.
With your gas estimate ready, it’s time to perform the actual transaction. This is done by calling the send method on a contract function. Once called, the wallet will prompt the user to confirm the transaction and, if all goes well, a token is minted.
The final step in the example calls the local CheckAssetURIs function to refresh the gallery. Since we just minted a token the asset is no longer available, so we want to remove it from the mint page. CheckAssetURIs calls the contract function tokenByUri. tokenByUri returns either the token ID (positive integer starting with 1) for the requested asset, or 0 if that asset has not been minted. In this case we will discard any asset URIs that return a token ID. Note that here it uses the call() method of the contract function rather than send(). This is because tokenByUri is simply returning data, it’s not updating the state of the contract. Therefore no transaction fees need to be sent.
let tokenId = await props.contract.methods.tokenByUri(uri).call();Create A Token Gallery
With a minted token in your contract, it’s time to view it in the website gallery. Click the “Gallery” link in the top navigation. The gallery displays image assets for all tokens available in the contract. At this point there is just one. You can return to the “Mint” page and mint a couple more if you’d like, Then return to the gallery to see the new tokens.
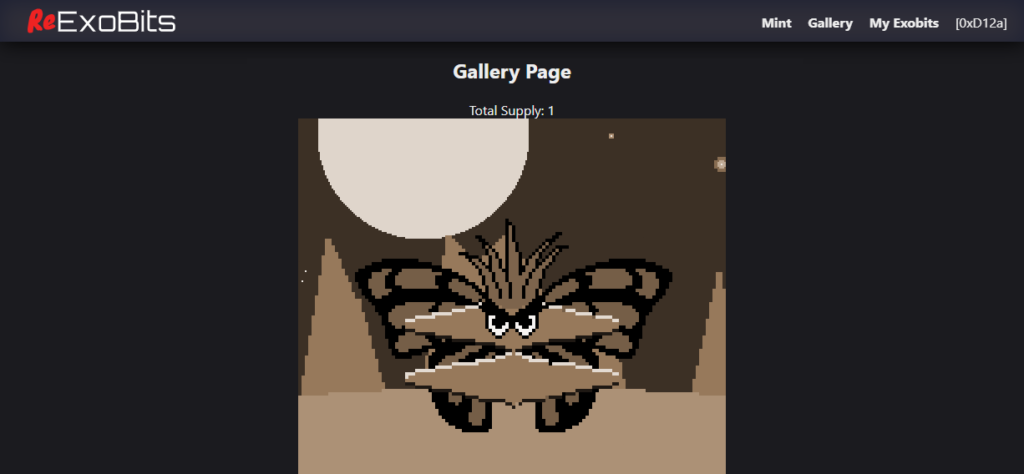
Now that you’ve got the hang of calling contract functions, obtaining the token data is quite simple. Let’s take a deeper look into the code that makes up the gallery. Open the project file /src/pages/Gallery.jsx. When the gallery loads, the first thing it does is call the contract function totalSupply. This function will return the total count of tokens stored.
const totalSupply =
  await props.contract.methods.totalSupply().call();
Since the token IDs are stored as incrementing integers starting with 1, we can simply loop from 1 to the total count and have the ID of every token. This is done in the gallery GetTokenURIs function:
const GetTokenURIs = async (totalSupply) => {
  if(!totalSupply) return;
  let tokens = [];
  for(let idx=totalSupply; idx>=1; idx - ){
    try{
      let tokenURI =
        await props.contract.methods.tokenURI(idx).call()
      let response = await fetch(tokenURI);
      let metaData = await response.json();
      if(metaData && metaData.image)
        tokens.push(metaData.image);
    }catch(e){
      console.error('Error occurred while fetching metadata.')
      continue;
    }
  }
  if(tokens.length) setTokenURIs([…tokens]);
};
This function accepts the total supply count and uses a for loop to iterate through every token ID. With each ID it calls the contract function tokenURI and receives the json metadata URI for that specific token. It then uses a fetch api request to retrieve the json data, parses it, and gets the image URI for the gallery.
This project simply renders <img> tags with the retrieved image URI as its src. How NFTs are displayed in the gallery will vary for each implementation. For example, the ExoBits website renders the NFT in a web component. So rather than retrieve the image URI, it instead retrieves a unique key value stored in the contract and loads that into the web component. The image is in turn rendered in real-time. This allows extra features like a simulated trading card you can click on to see stats on the back. Token owners even have access to special features that no one else does like slow-mo redraw, remove the background and download the image.
Owner Gallery
Speaking of owners, since NFT collections tend to number in the thousands, it’s not a good user experience to make people scroll through an entire gallery to find their tokens. We can set up a private gallery so owners can see only their tokens. Take a look at the project file: /src/pages/MyTokens.jsx. You’ll see that it works almost exactly like the gallery page with one difference. Instead of retrieving the total supply of tokens, this instead calls the contract function tokensOfOwner:
const userTokens = await props.contract.methods.
  tokensOfOwner(props.address).call();
This function accepts a wallet address and returns an array of token IDs owned by that address. In this case we pass the address of the connected wallet to retrieve the token IDs. It then loops through that array, retrieving the token data in the same fashion as the gallery page.
Wrap Up
With this you have all of the core functionality that every NFT website needs. Use this as your starting point. Build functionality onto it suited to the uniqueness of your own NFT. If you’re not familiar with writing smart contracts, it’s best to explore that aspect of this process next. The power of NFTs lies in how you represent the token owner’s data in the contract. A clear understanding of smart contracts allows you to best solidify your NFT’s key information in the blockchain.
If you found this article helpful, head over to ExoBitsNFT.com and mint your own ExoBit NFT. The Ether made from ExoBits goes toward funding future NFT projects and tutorials like this one. Follow me, @greenzeta, on twitter for updates on projects and tutorials in development.